Table Of Contents
Fix Google Error “Couldn’t Sign in – Problem Communicating with Google Servers.
Adding your google account is a terrific way to get various programs are linked by emails to your Google account. But a lot of users are visiting that the”there has been a problem communicating with servers”google error when trying to add their Google account to their own phones. Some users are seeing this error after entering all their Google accounts details, whereas others view this message any time they click the Insert account from the telephone settings. The main point is that you will not be able to add your Google account to your cell phone.
There Was A Problem Communication With Google Server
Here is the list:
Two-Step Verification: 2 step verification is an amazing feature that prevents other users from signing in to your accounts. This attribute is known to stop making use of your account. While building a connection with your 14, this may be causing issues. This is also quite common when incorporating your accounts to other apps like Outlook, these apps will not add your account until you include the apps from the account settings or disable 2 Measure confirmation. So, the solution for this is to disable two-step verification.
Corrupted Cache: Temporary/cache files are saved on your device to make the apps work faster. These files may get corrupted and, therefore, cause to misbehave. This error may result from this thing along with the solution is to clear the cache of all those apps.
Hosts File: Hosts files are found on your system that has some importation cell phone configuration information. This problem can be caused by the content of those documents. Modifying this Hosts file’s contents will most likely solve the issue in this situation.
Notice: First, try to reboot your telephone, before performing the steps given in the methods given below. There is not a problem and also our devices/software misbehave because of unknown reasons and also fixes these types of issues.
Try again and you also need to try to eliminate the added Google accounts in the list of account. All you have to do is visit Settings > Select Google Account > Click the 3 dots > Eliminate Account. For all of the added Google Accounts do this and add the account.
On occasion, the 2-step authentication procedure might be interfering with the signal from your Google accounts or it might be the corrupt cache from your Google Account manager (and several other apps). Clearing the cache of some apps and disabling the 2-Step confirmation process has helped solve the problem for a number of users. So, follow the steps given below to perform these tasks all
Note: You can disable the confirmation from the browser of the phone as well but the measures will be given by us for pc browser. The steps should be exactly the exact same for both devices.
1.Open your browser and type com in the address bar. Press Input.
2.Register in to your Google account
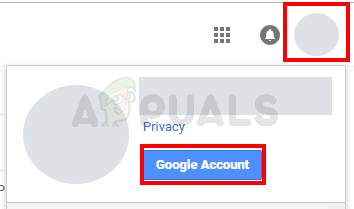
3.Click your profile image in the top right corner
4.Select Google Account
5.Click Your Gmail Profile Picture and Select Google Account
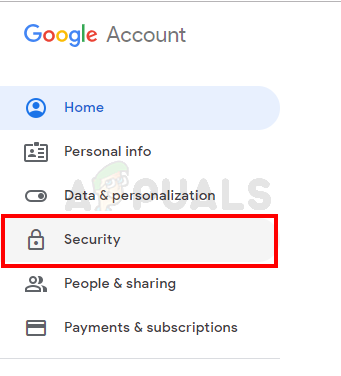
7.Click Security To Open Gmail Security Options
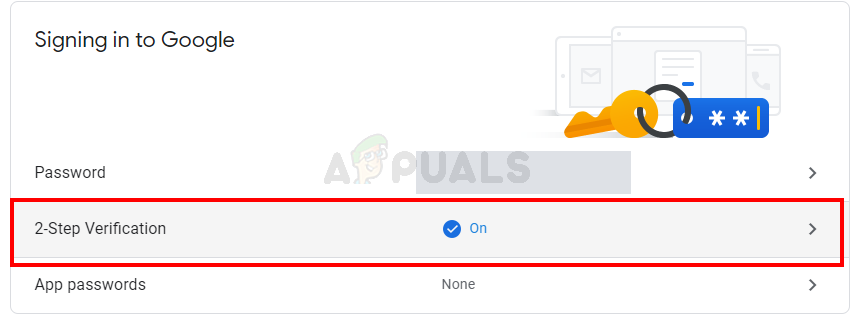
8.Scroll down and select the 2-Step Verification
9.Select 2.-Step Verification To Open 2-Step Verification Settings
10.Sign in again
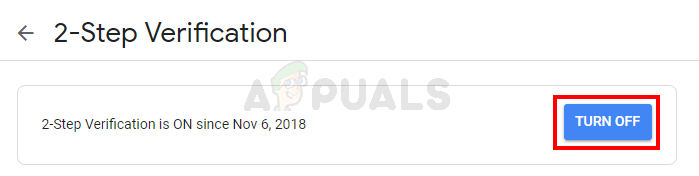
11.Click Turn off
12. Click Disable To Disable 2-Step Verification
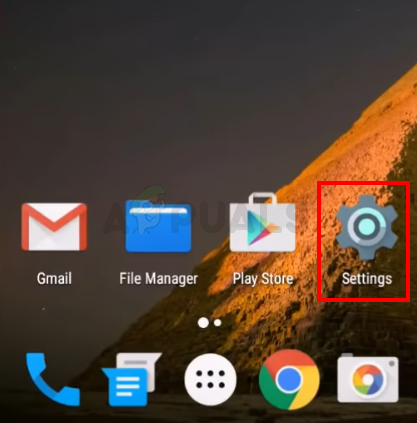
Today, we will clear the cache of various programs. Go for your Android phone and start Settings
Click Settings to Open Settings in case you’ve got your Google account already added for your phone then select Account and eliminate your Google accounts in the list. Otherwise, skip this step.
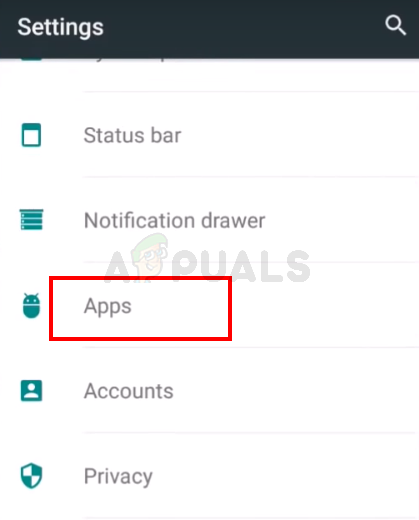
Select Apps (or App Manager)
Click Apps from Settings Menu
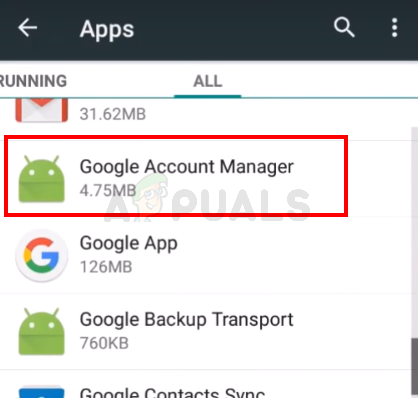
Find Google Account Manager from the list of apps. Notice: In some phones, you might have to swipe into the right to alter the tabs. If that is the case then make sure that you are in the All tab. This is because some telephones categorize your programs in accordance with their standing e.g. running, sd card, etc.. If it isn’t running at the moment so, Google Account Manager might not appear at the list of running apps. You have to appear in the listing of all apps.
Click Google Account Manager To Open Google Account Manager
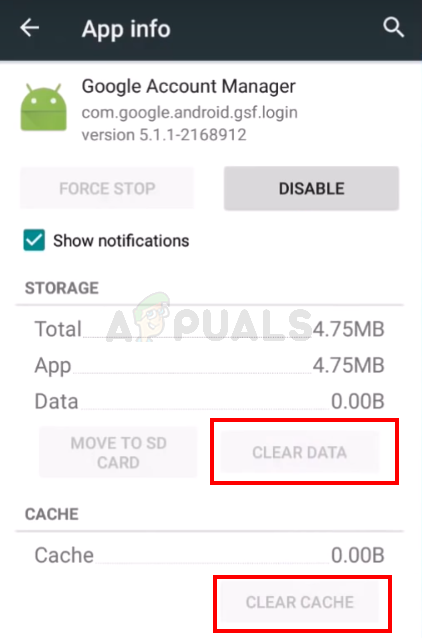
13.Once you start the Google Account Manager, pick Clear Data
14. Select Clear Cache.Click Clear Cache to Clear Cache of Google Account Manager
15.Repeat the last 3 steps for Google Play Store, Google Play Services, and Google Services framework. Do not worry if you can not locate the Google Services Framework, some phones do not have it.
Once done, return to the settings page and attempt to bring the account. You ought to have the ability use it and to add your accounts.
Sometimes the problem might be with the Google Play Service app. These solutions sometimes get corrupted and all you need to do is reinstall these.
PRO TIP: If the issue is with your computer or a laptop/notebook you should try using Reimage Plus which can scan the repositories and substitute corrupted and lost files. This works in most cases, in which the issue is originated due to a procedure corruption. You can download Reimage from Clicking Here
1.Select Settings.
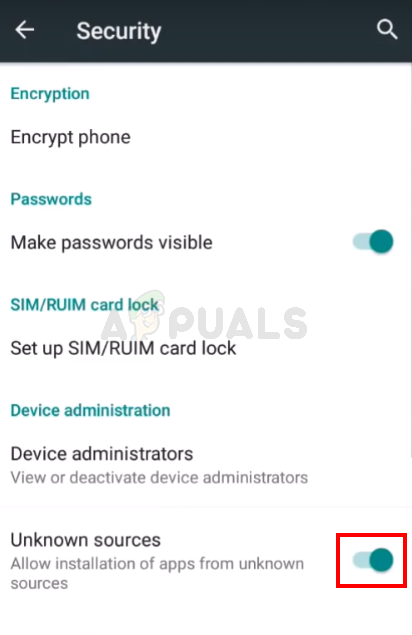
3.Toggle on Unknown sources . This will make it possible for you install applications from sources. We want if we must set up the apk that is downloaded from that site, this option enabled since apkmirror files are considered sources.
4.Now, open Google (or any other browser in your telephone )
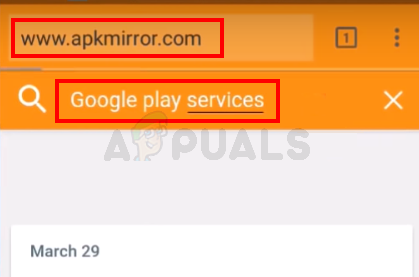
5.Type apkmirror. Com from the speech and press Enter or go
6.Click on the Search icon and type Google Play solutionsSort apkmirror.com In The Browser and Press Enter. Subsequently Search Google Play Services
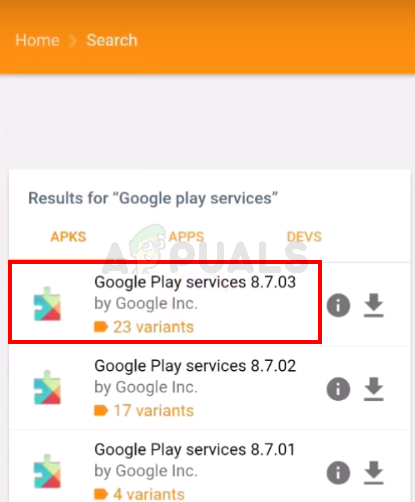
7. Click on the best result from the list of results. The top ones are the most recent ones and you would like the most recent version of Google Play Services.Select The Top Result of Google Play Services
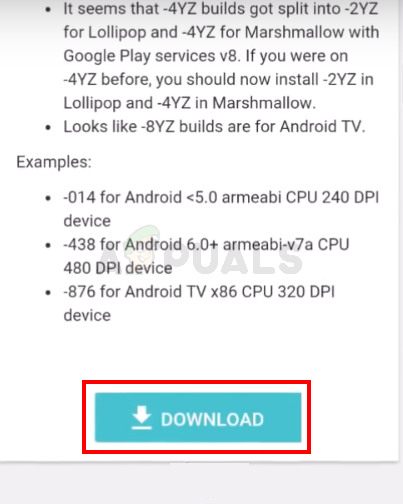
8. Download the appropriate Google Play Service file (for your particular android version and phone). Then follow the instructions given on the download page if you aren’t sure which version is suitable for your device. There should be detailed directions on the page.
9.When the document is downloaded and installed, go to Settings and select Accounts. Insert your Google Account
You ought to have the ability to add your account and register in without any problems.
Notice: in case you don’t know what a rooted phone is or if you aren’t sure whether your phone is rooted or not then skip this method. This is an improvement technique.
1.Select Settings
3.Toggle on Unknown Sources. This will make it possible for you to install applications from sources that are unknown. We want this option enabled if we must install the apk that is downloaded with that website since apkmirror files are thought to be unidentified sources.
4. Now, open Google (or any other browser from your phone )
5.Type apkmirror.com from the address and press Enter or go
6.Click on the Search icon and form ES File Explorer
7.Click on the top result in the list of results. The top ones are the latest ones and you want the latest version of ES File Explorer
8.Download the latest and Proper version of the ES File Explorer and install it
9.Now, open ES File Explorer
10.Click 3 Bars To Open ES File Explorer Options
11.Select Tools
12.Toggle On Root Explorer
13.Click Local
14.Select Device. You should be able to see multiple folders on the right pane
15.Select System then open etc folder
16.Click Hosts document and choose Text in the dialog that asks the way to open this document. You need to open this document as a text file. Select ES note editor when the prompt asks you to pick the note editor.
17.Now, remove everything in the document and type 127.0.0.1 localhost from the Hosts file
18.Click on the back button and be sure that the changes are stored. You may click the hosts file again and check its content just to be sure Sort 127.0.0.1 localhost in The Hosts File
19.Visit Settings and choose Accounts. Add your Google Account
You should be able sign in without any problems and to add the accounts.
We hope that you got the solution to this problem. Let us know if you still facing the problem of google couldn’t sign
Insurance companies entered the market many years ago, and insurance remains in demand because security…
Thumbnails are very much important for a YouTube video and hence a YouTube channel. Designing…
[epcl_box type="success"] ✅Updated on AUGUST 2, 2020: SAMSUNG ROLLED OUT NEW USB DRIVERS [/epcl_box] [epcl_box…
Today, we are introducing you Whatsapp plus. As we all know, how much Whatsapp has made…
🤡 Cartoon HD For PC: In this era of Technology, we all have witnessed a…
Adaway: In the last one and two Decade the mass shift towards the smartphone has…